An interactive build (sometimes also called IDE build, or GUI build) is triggered by pressing the “Build Active Transformation Configuration” toolbar button:

This button is always enabled and builds the active TC in the selected project. If a project is not directly selected in the Project Explorer, Model RealTime uses the project to which the selected element belongs. For example, if you select a capsule the Build Active TC button will build the active TC in the project that contains the capsule.
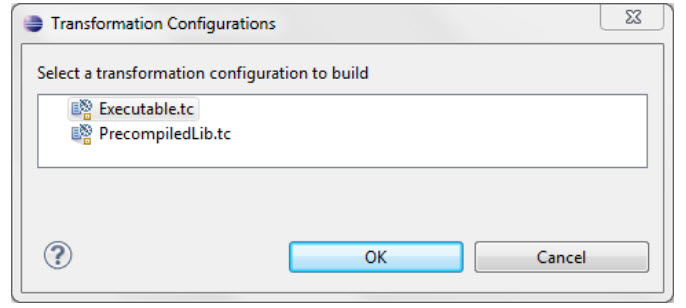
If the project contains TCs but none of them is marked as active, then a dialog will appear which lets you choose which of the project's TCs to activate and build:

If the project does not contain any TCs at all, the dialog will let you choose a TC from another project in the workspace.
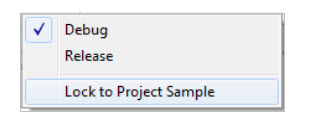
Often you always want to build the same TC no matter what element that happens to be selected at a particular point in time. In this case you should lock the Build Active TC button to the project that contains that TC. This is done from the menu that appears when clicking on the black triangle to the right of the button:

Once you have locked the button to a project, it is no longer sensitive to the selection and you can press it to build the active TC of that project at any time.
Using this button menu you can also choose to build another TC that is not active. When you choose the other TC it will be marked as active. After that you can press the Build Active TC button to build it.
Important: Eclipse has an option to build projects automatically (”Build Automatically” in the Project menu). Ensure that this option is off when building a TC from the user interface. Otherwise the generated CDT project may not get built when building a TC, and the build will terminate after the code generation phase.
As soon as the build of the TC has been started, Model RealTime will pop-up the UML Development console in the Console view. This is where all build messages will be printed. You may want to pin this console to ensure that it stays open during the entire build process.
Build messages that are printed to the UML Development console may include:
TC validation messages (same as are reported when running an explicit validation of the TC)
Transformation messages (e.g. warnings or errors detected during C++ code generation) – see Model Compiler Validation Rules.
Compiler messages
Linker messages
You can double-click on messages in the UML Development console in order to navigate to the location of the message. This could either be a TC, an element in the model, or it could be somewhere in the generated C++ code.
By default, compiler and linker messages (and all other messages produced by make) are printed directly to the UML Development console. If you prefer you can set the preference RealTime Development – Build/Transformations – Show make log in UML Development Console. Then such messages will instead be printed to a build log and a link to this file is printed in the UML Development console together with a message if the compilation failed due to errors. For example:

Most messages also have a representation in the Problems view, and when a message in the UML Development console (or in the Build log) is double-clicked, the corresponding problem in the Problems view will be selected. From its context menu you can choose to navigate to other locations where the problem can be fixed, or where to find more information about it. You can also choose to navigate to the build log to see the context of the problem. Sometimes this is necessary in order to understand how to fix it.

You can manually remove problems from the Problems view by deleting them. For example, you may want to delete problems that you have looked at or fixed. When you start a new build you may want to automatically delete all or some of the problems that already exist in the Problems view so that it becomes easier to see the problems that are caused by that particular build. To control what to do with the Problems view when you start a new build you should set the preference RealTime Development –Build/Transformations - Clean Problems View before build:
Do not clear problem markers
Use this if you prefer to manually delete problems from the Problems view.
Clean problem markers for all built projects
This choice will delete those problems that are reported on the projects that are built. This includes both the source model projects (for example warnings on model elements produced by the code generator) and the target CDT projects (for example compilation errors). Problems reported on projects that are unrelated to the build will remain. The idea here is that only those problems that were caused by building the same TC previously should be removed, before the TC is built again. Any problems that remain will then reappear as a result of the new build.
Clean problem markers for all built projects and all CDT projectsThis choice works the same as the above, but in addition problems that are reported on other CDT projects are also removed. This may be useful if you have external C++ code that gets included in the build, for example using C++ External Library TCs (as described in External Libraries).
Clean all problem markers
Use this if you want to always remove all old problems when starting a new build.
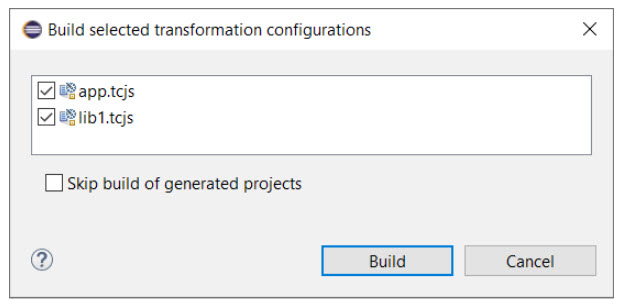
An alternative to building a TC using the ”Build Active Transformation Configuration” button is to invoke the command "Build…" in its Project Explorer context menu. This command also works when you have multiple TCs selected, and is therefore in particular useful if you want to build several unrelated TCs.
The "Build…" command brings up a dialog where you can select the TCs that you want to build (by default those that were selected in the Project Explorer):

When you press Build all the marked TCs will be built one by one.
If you only want to run the transformation step for the TCs (i.e. only generate the code but not build it) then you can mark the checkbox "Skip build of generated projects".
Let's go into some more detail about what happens when performing an interactive build, and some alternative ways to trigger it.
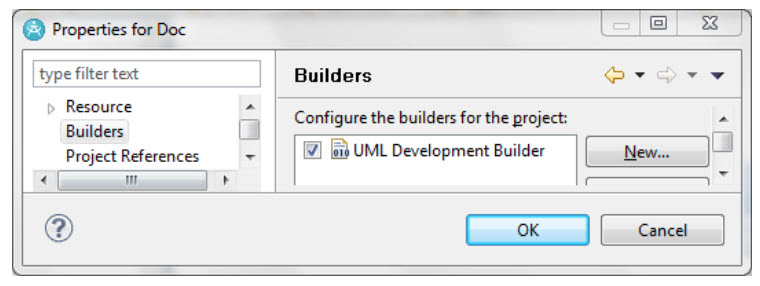
An interactive build is controlled by an Eclipse builder called the UML Development Builder. If you look in the properties of an Model RealTime model project you will see in the Builders tab that the project is built using this builder.

The Eclipse builder framework provides user interface that allows you to invoke the UML Development Builder on a project. For example, it provides a "Build Project" command in the context menu of a project (available if Project – Build Automatically has been turned off). When the UML Development Builder is asked to build an Model RealTime model project it will look for active TCs in that project. All TCs that are marked as active will be built, one by one.
Usually there should be no need to perform interactive builds through the general Eclipse builder user interface. Most often there is one particular TC in the project that shall be built, and therefore it is better to use the “Build Active Transformation Configuration” button for building that specific TC as described previously. If the project contains multiple TCs that should be built, the context menu command "Build…" can be used.
A special feature of an Eclipse builder is the ability to automatically build a project as soon as it or its content changes. This behavior is controlled by the preference Project – Build Automatically. This feature is not appropriate to use with the UML Development Builder, especially not when a makefile is used for building generated C++ code. It is therefore strongly recommended to have this preference turned off when building Model RealTime C++ models (it is turned off by default in Model RealTime).